Thought some of you might be interested in this little job.....
This is a family of work i do from time to time using different sizes and different thread pitch...
The point here is to take a new connecting rod , in this case Carrillo, and prep the ID to accept Babbitt.
Of course the first question is why would anyone use a poured white metal bearing on the big end of a con rod.....
For many of the cars i work on there are no suitable thin wall bearings, plus many of the older cranks are plain steel...not nitrided , and finally
using a poured bearing allows grinding the crank the very least and extends the life of the old parts.....
OK so here is the drill:
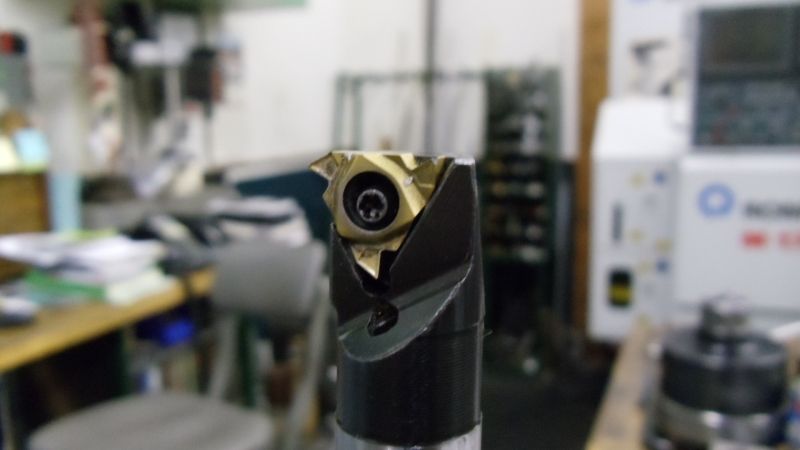
to start i mount a standard "lathe" style threading boring bar in a collet chuck.
I favor the round metric bars by Sandvik. I like the round versions because they work with the indexing bushings that i use on my Romi in my MultiFix holders.
Since the boring bar holders are metric (40 mm) i am tied to a metric busing to adapt from the 40 to the bar diameter...in this case 16mm.
![]()
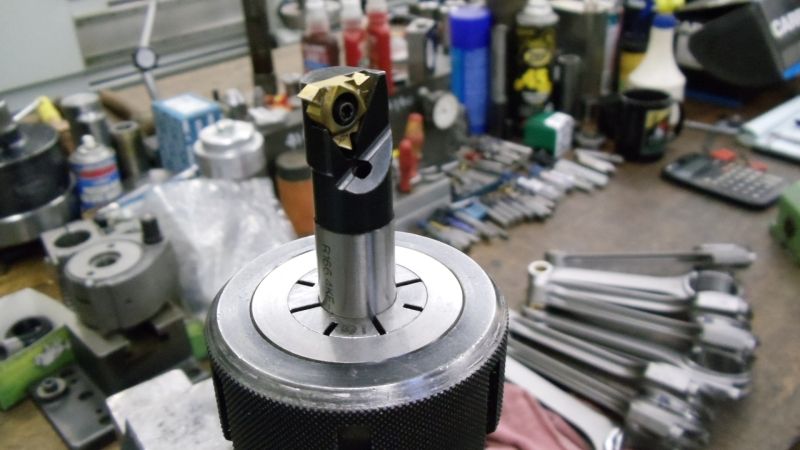
The collet chuck of choice here is a TG100. I use the TG setup on all my larger tools. I believe that it gives better grip than the same sized ER setup.(longer shallower taper on the TG's= more holding power)
![]()
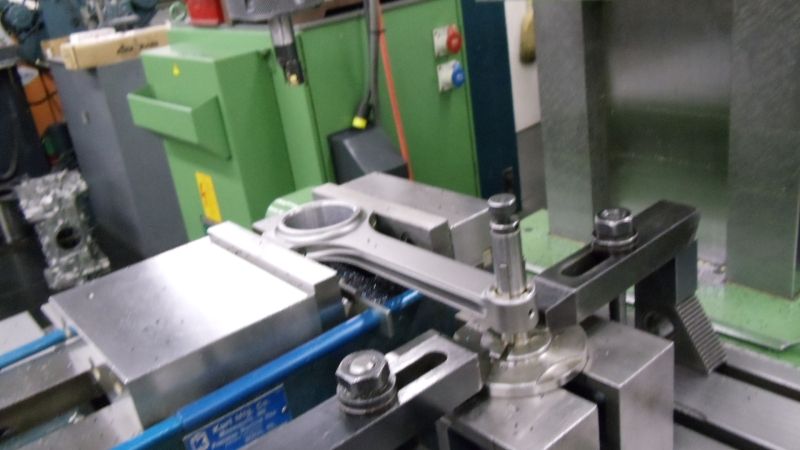
OK here is the basic setup. The sides of the big end of the rod are flat and parallel, so i grip in the vise on parallels. To give a repeatable location i am using a small expanding mandrel that is from my connecting rod boring machine.
(Berco AB 320). The rod machine has a selection to these mandrels of varing sizes with different jaws to cover quite a range of sizes...very handy , and i use them on the boring machine, on the lathe ond on the mill as you see.
![]()
It is important here to be careful of the closing force on the rod as you can make the big end bore oval if you get too husky tightening the vise.
I do check each rod for position before running the job. Over tightening will show when the bore is clocked...
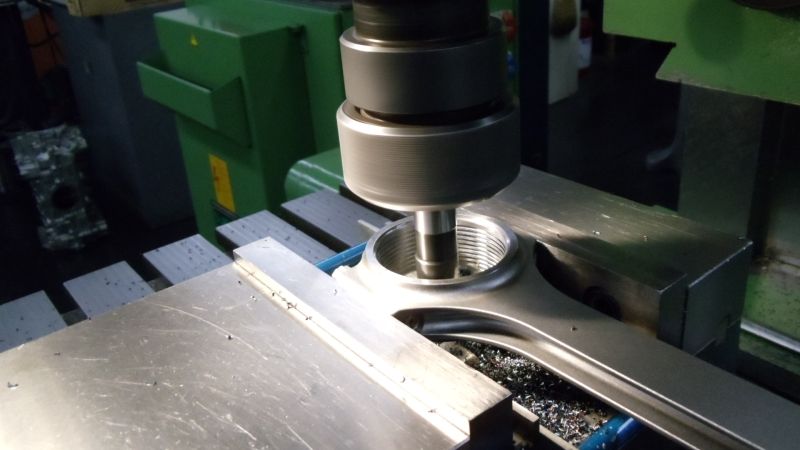
Here is the job in process....the cut is started below the top of the rod and ends before it exits the rod at the bottom. This gives a dead ended cut with no runout to help secure the babbitt.
![]()
More to follow...
Cheers Ross
This is a family of work i do from time to time using different sizes and different thread pitch...
The point here is to take a new connecting rod , in this case Carrillo, and prep the ID to accept Babbitt.
Of course the first question is why would anyone use a poured white metal bearing on the big end of a con rod.....
For many of the cars i work on there are no suitable thin wall bearings, plus many of the older cranks are plain steel...not nitrided , and finally
using a poured bearing allows grinding the crank the very least and extends the life of the old parts.....
OK so here is the drill:
to start i mount a standard "lathe" style threading boring bar in a collet chuck.
I favor the round metric bars by Sandvik. I like the round versions because they work with the indexing bushings that i use on my Romi in my MultiFix holders.
Since the boring bar holders are metric (40 mm) i am tied to a metric busing to adapt from the 40 to the bar diameter...in this case 16mm.
The collet chuck of choice here is a TG100. I use the TG setup on all my larger tools. I believe that it gives better grip than the same sized ER setup.(longer shallower taper on the TG's= more holding power)
OK here is the basic setup. The sides of the big end of the rod are flat and parallel, so i grip in the vise on parallels. To give a repeatable location i am using a small expanding mandrel that is from my connecting rod boring machine.
(Berco AB 320). The rod machine has a selection to these mandrels of varing sizes with different jaws to cover quite a range of sizes...very handy , and i use them on the boring machine, on the lathe ond on the mill as you see.
It is important here to be careful of the closing force on the rod as you can make the big end bore oval if you get too husky tightening the vise.
I do check each rod for position before running the job. Over tightening will show when the bore is clocked...
Here is the job in process....the cut is started below the top of the rod and ends before it exits the rod at the bottom. This gives a dead ended cut with no runout to help secure the babbitt.
More to follow...
Cheers Ross